
Step 1: Create and Verify Your PerfectCSR Account
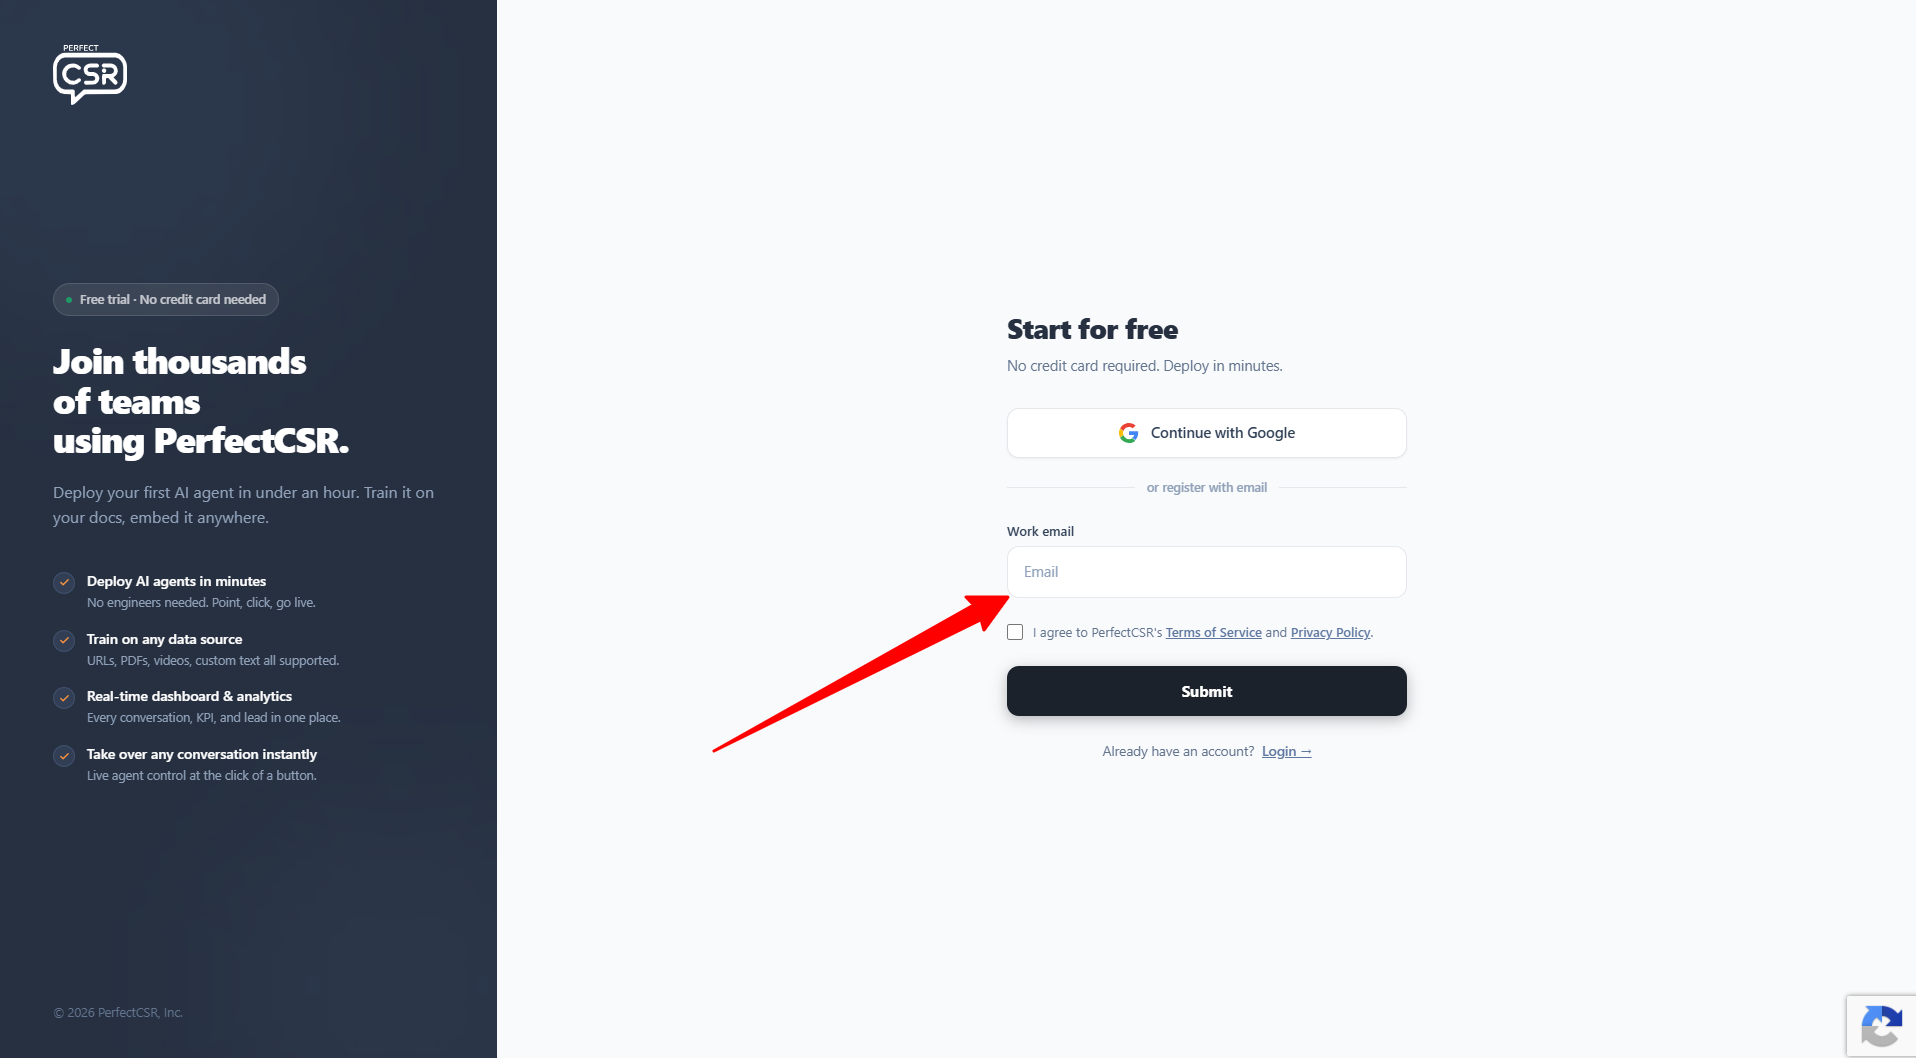
- Go to the PerfectCSR registration page.
- Sign up with:
- Google, or
- Your work email.
- If registering with email:
- Enter your work email address.
- Check the Terms of Service and Privacy Policy box.
- Click Submit.
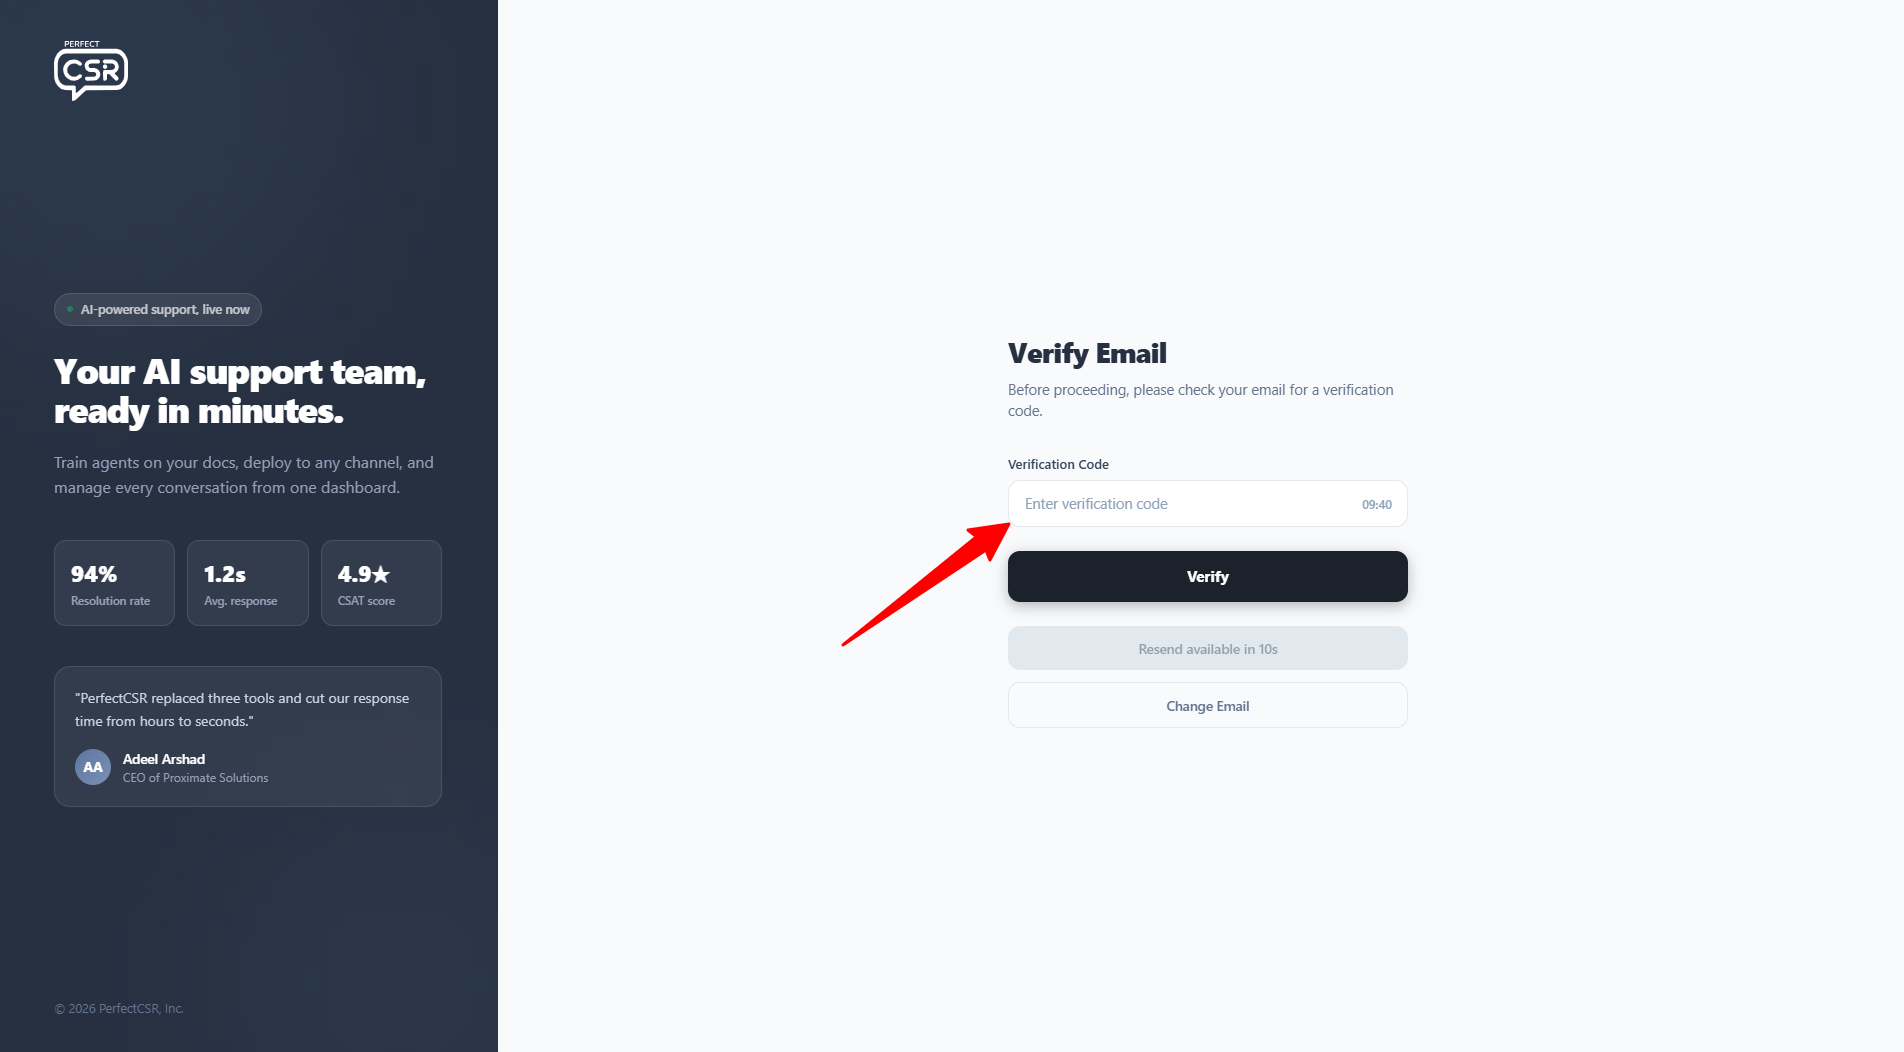
- Check your email inbox for the verification code.
- Enter the verification code on the Verify Email screen.
- Complete verification within the time shown on the verification screen.
- If you do not receive the code:
- Select Resend to request another code.
- Select Change Email if you entered the wrong address.
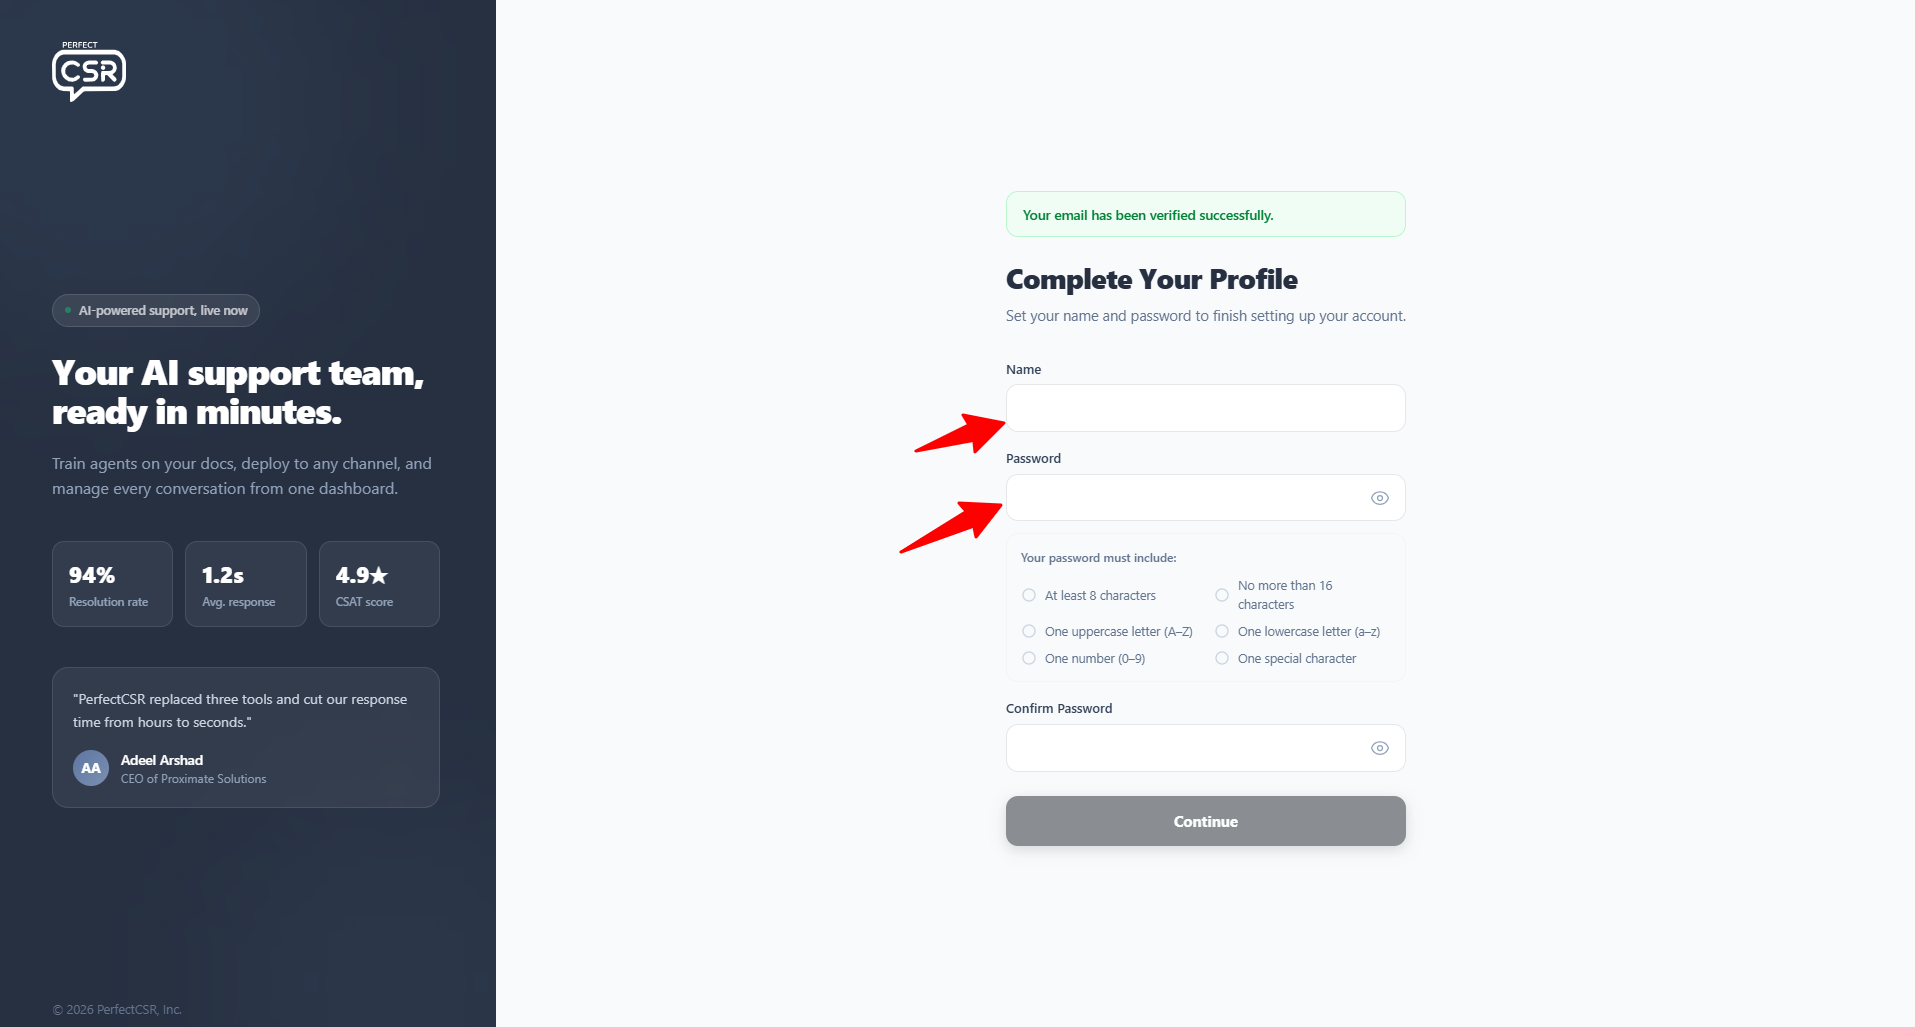
- After verification, complete your profile:
- Enter your name.
- Create your password.
- Confirm your password.
- Click Continue to enter PerfectCSR.
Step 2: Create Your New AI Agent
- Select Create New Agent.
- Enter your Agent Name.
- Enter the URL of the website where you want to use PerfectCSR.
- Choose the agent type that best matches your website:
- Information: Versatile agent for any website.
- Support: Customer support focused.
- Shopify: Optimized for e-commerce stores.
- WooCommerce: For WooCommerce online shops.
- WordPress: Tailored for WordPress websites.
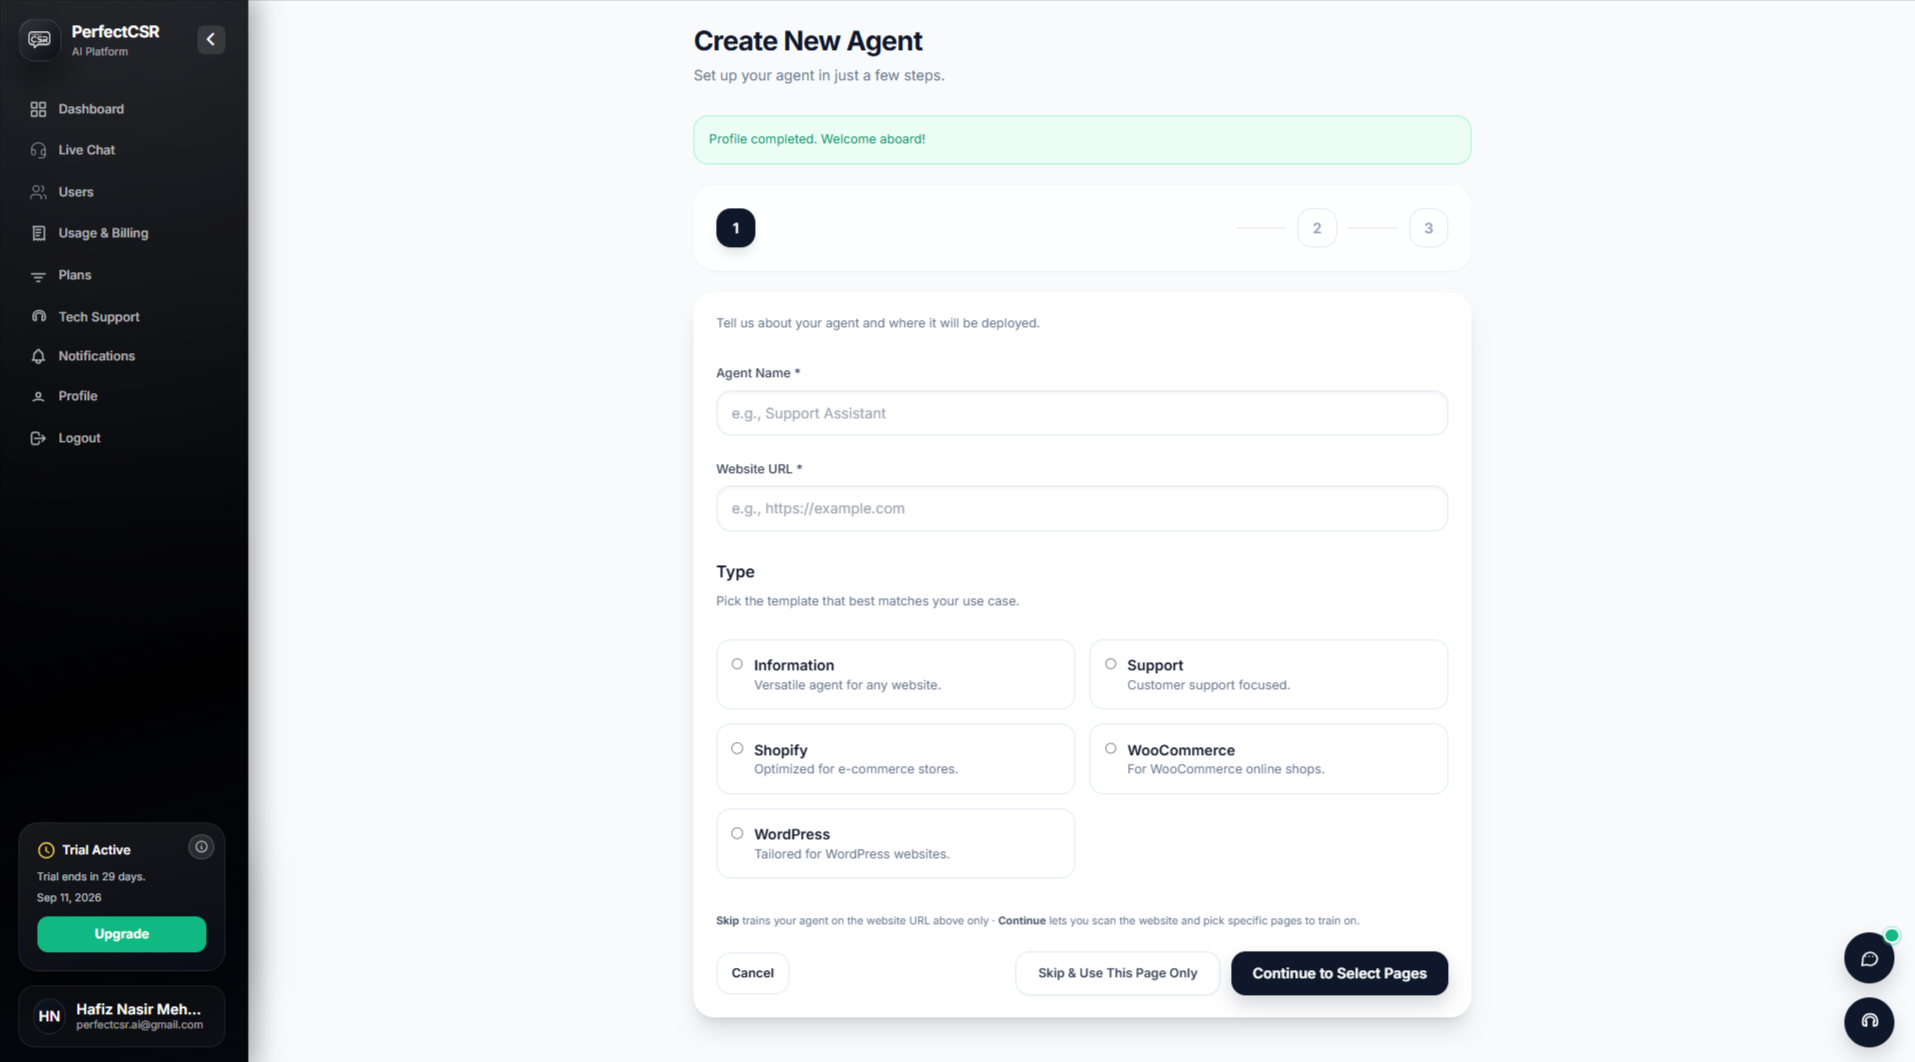
- Choose how you want PerfectCSR to use your website:
- Select Skip & Use This Page Only to use only the URL you entered.
- Select Continue to Select Pages to scan your website and choose specific pages.
- If you continue to page selection:
- Review the pages PerfectCSR finds.
- Select the pages containing useful business information.
- Skip irrelevant pages.
- Continue once your pages are selected.
- Complete the setup to create your agent.
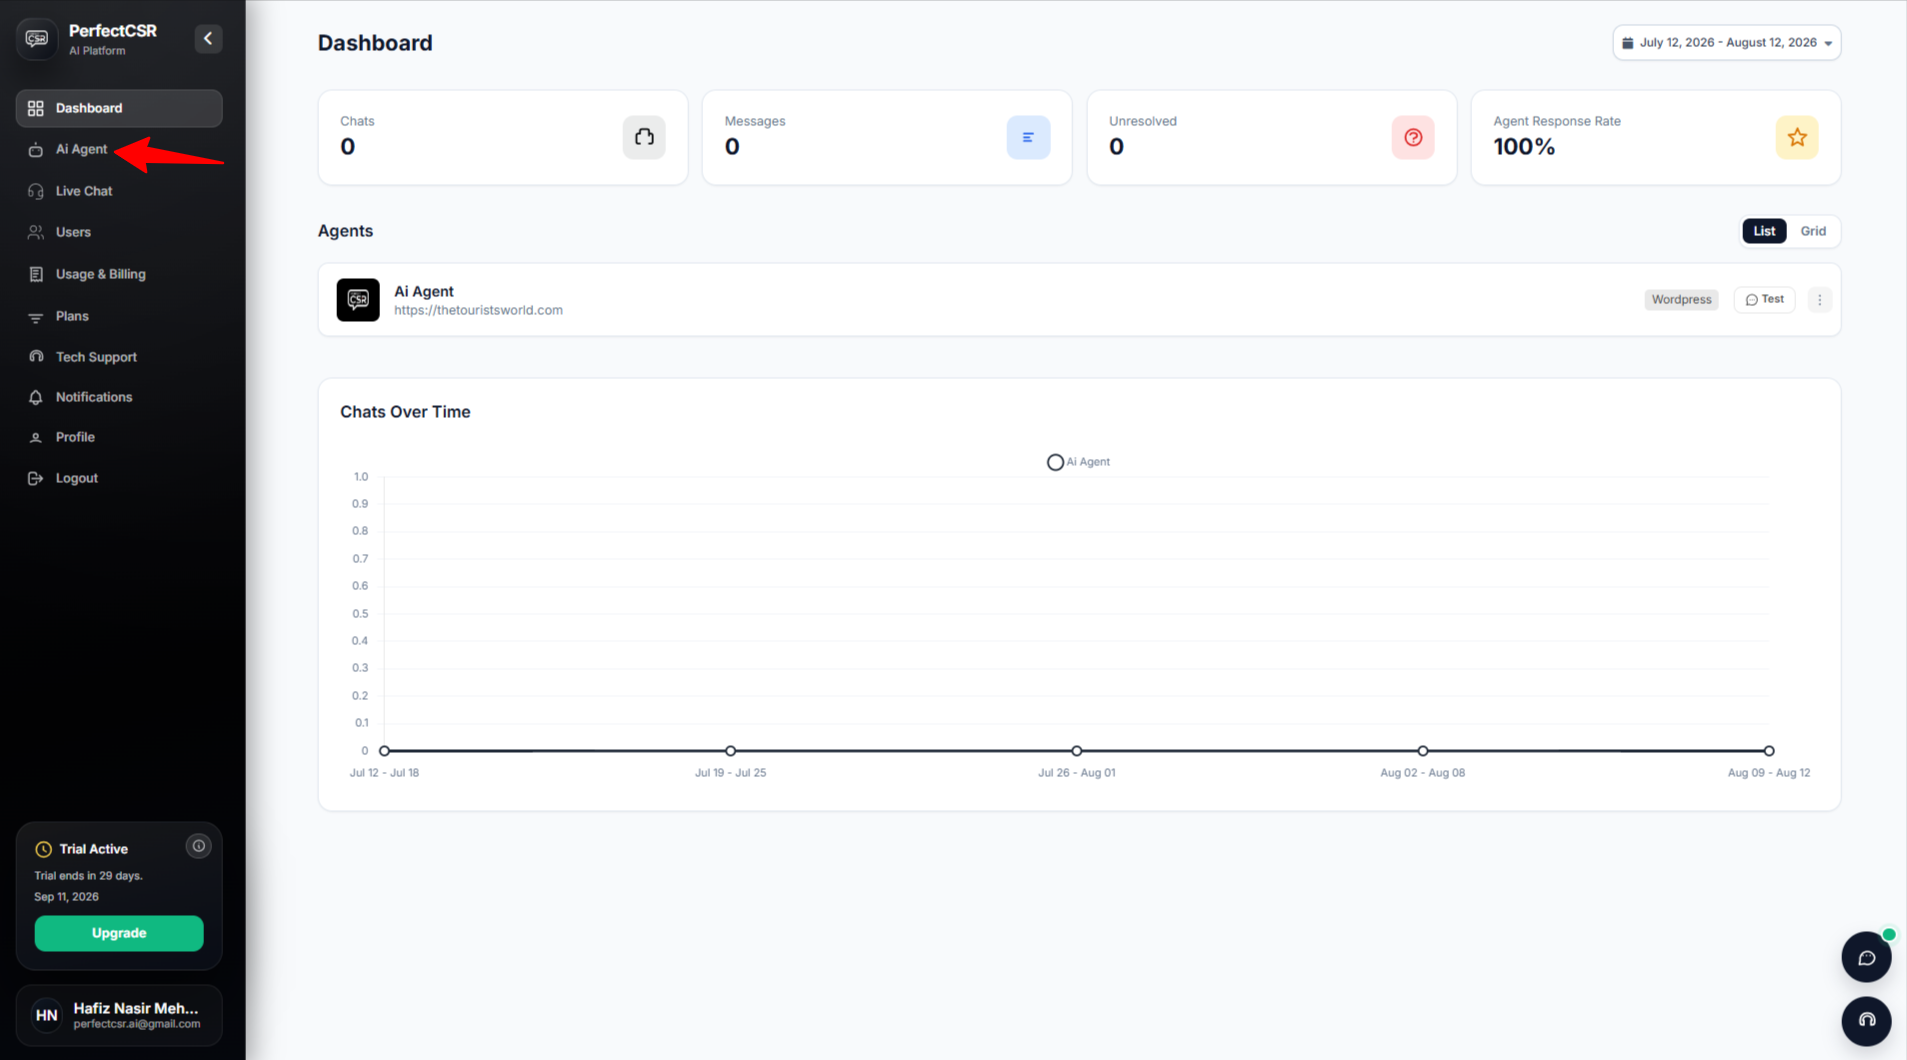
- Your new AI agent will now appear in your PerfectCSR dashboard.
- Use the Test option from the dashboard to test your newly created agent.
Step 3: Train Your AI Agent for Your Business
- Open your AI agent from the left-side dashboard menu.
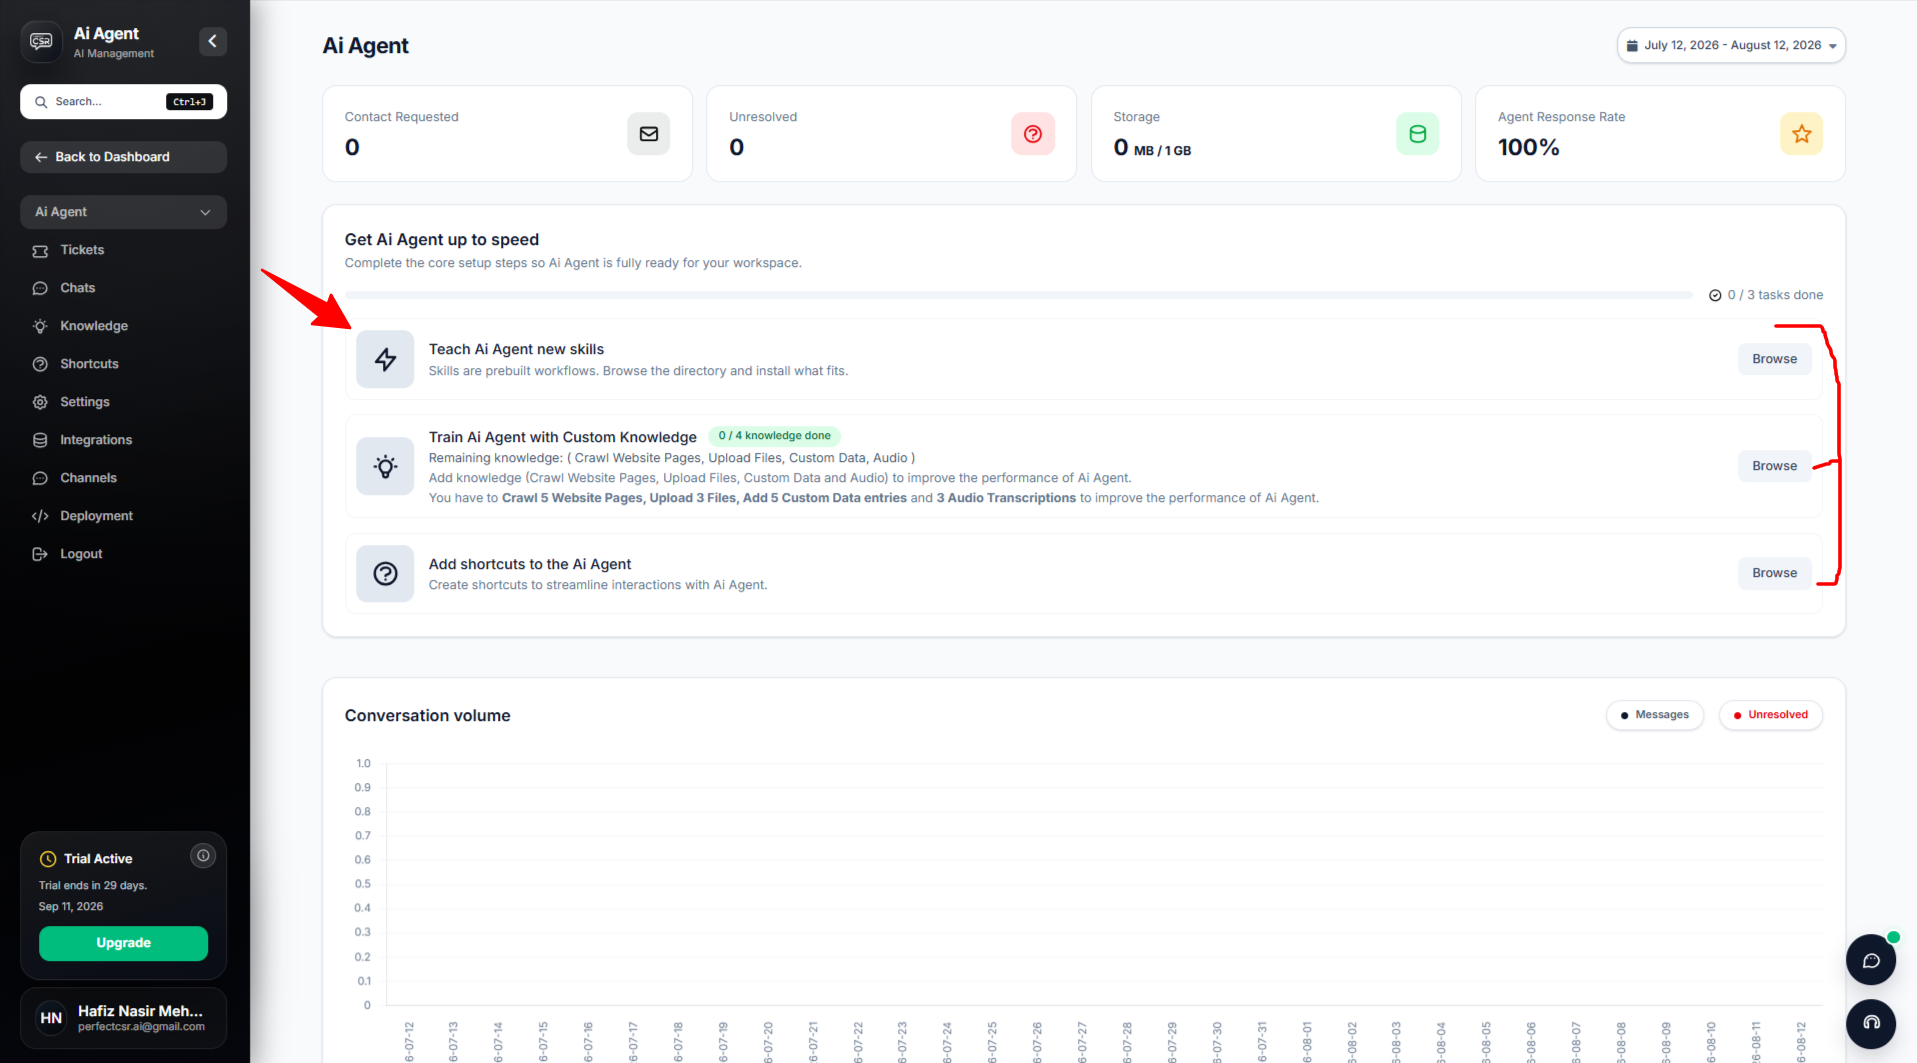
- Use the Get AI Agent up to speed section to complete its setup.
- Add the information and capabilities your agent needs.
Add AI Agent Skills
- Open Teach AI Agent new skills.
- Browse the available skills.
- Add skills relevant to your business.
- Skills can cover tasks such as:
- Return policies
- Order tracking
- Product help
- Other business-specific tasks
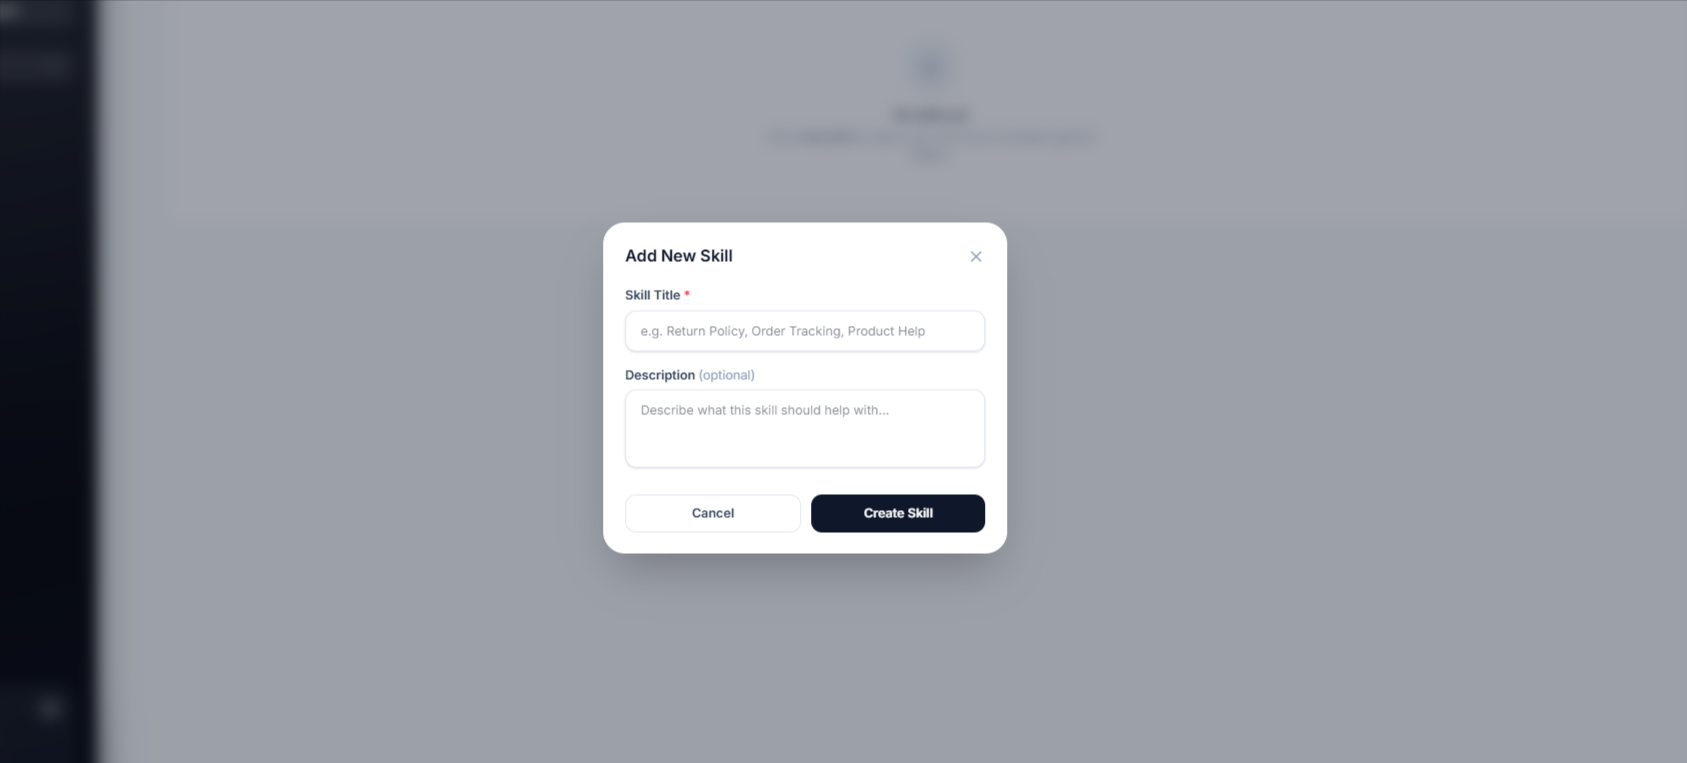
- When creating a skill:
- Add a Skill Title.
- Add a description if needed.
- Select Create Skill.
Add Custom Knowledge
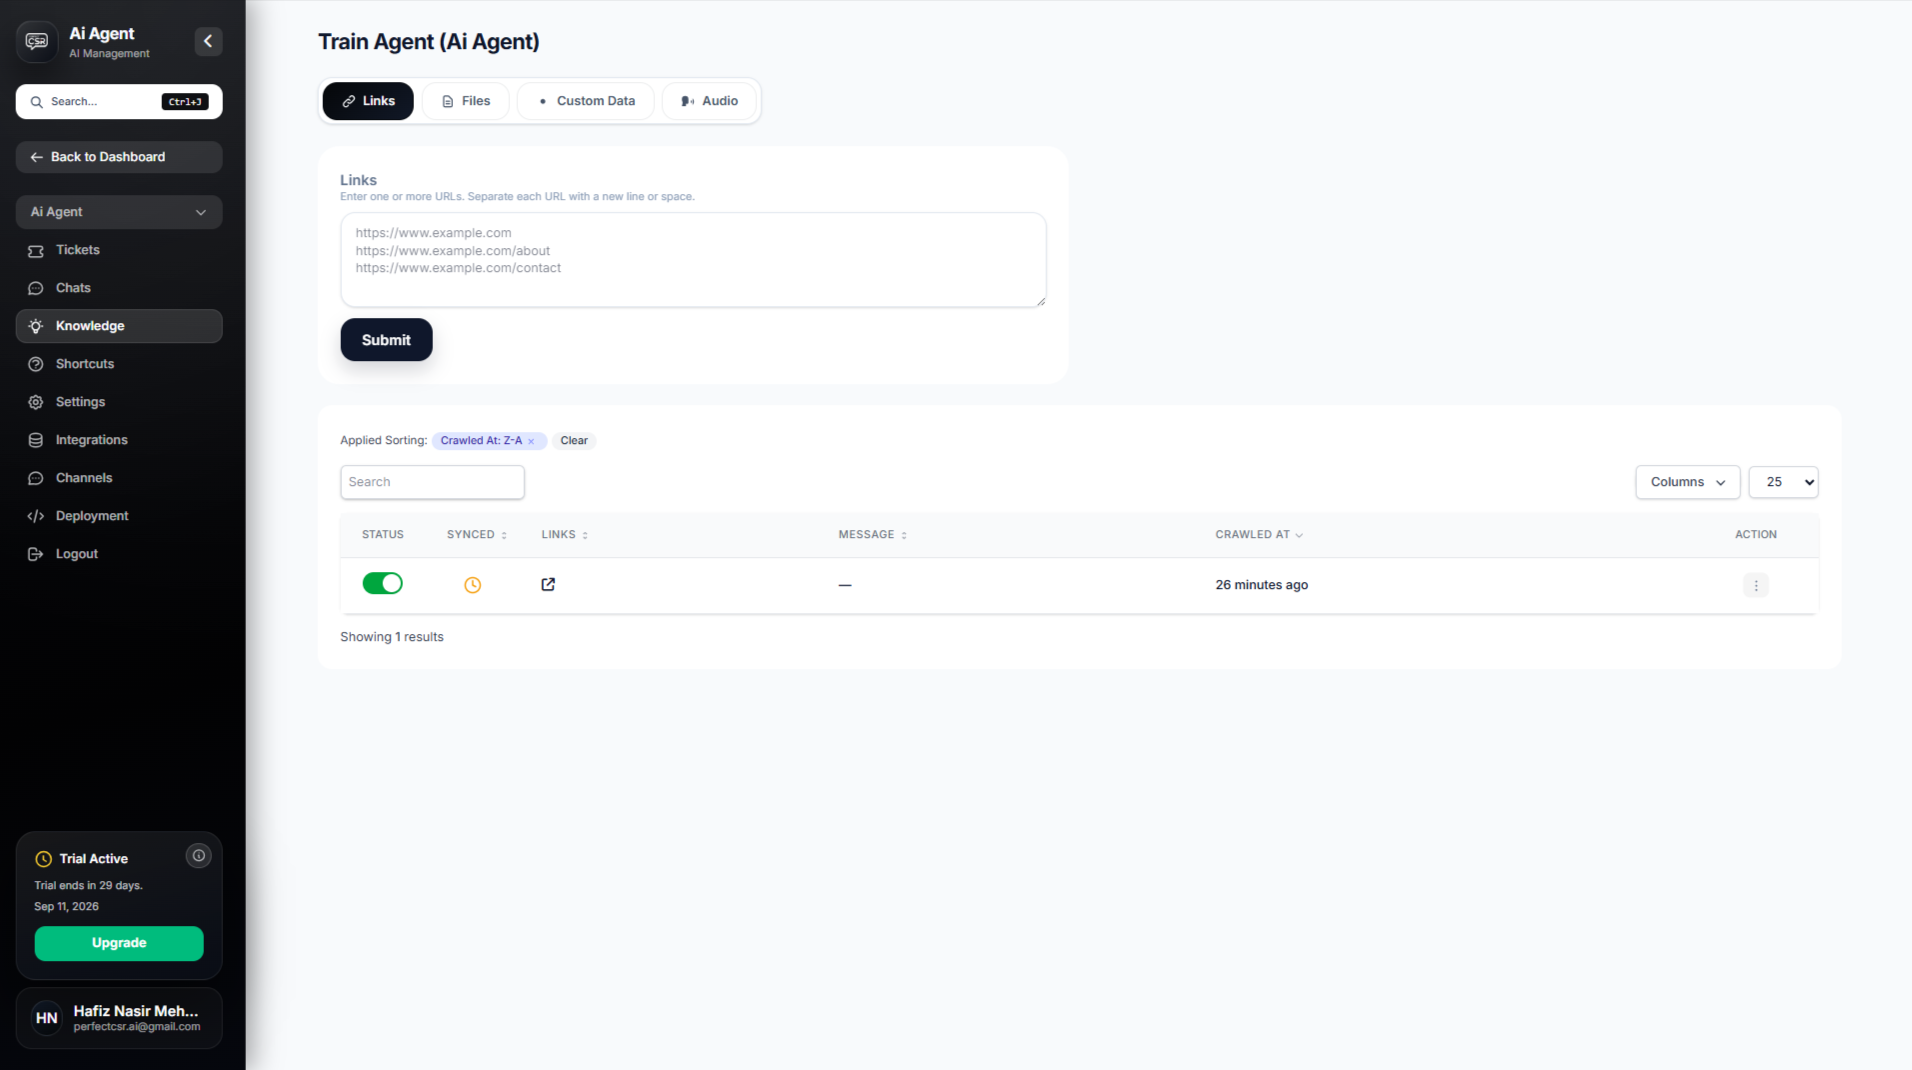
- Open Train AI Agent with Custom Knowledge.
- Add knowledge using:
- Crawl Website Pages
- Upload Files
- Custom Data
- Audio
- Use website links to add or crawl additional pages.
- Upload relevant business documents and files.
- Add information that may not already appear on your website through Custom Data.
- Add audio content when relevant.
- Keep the knowledge base focused on accurate, current business information.
Add Shortcuts
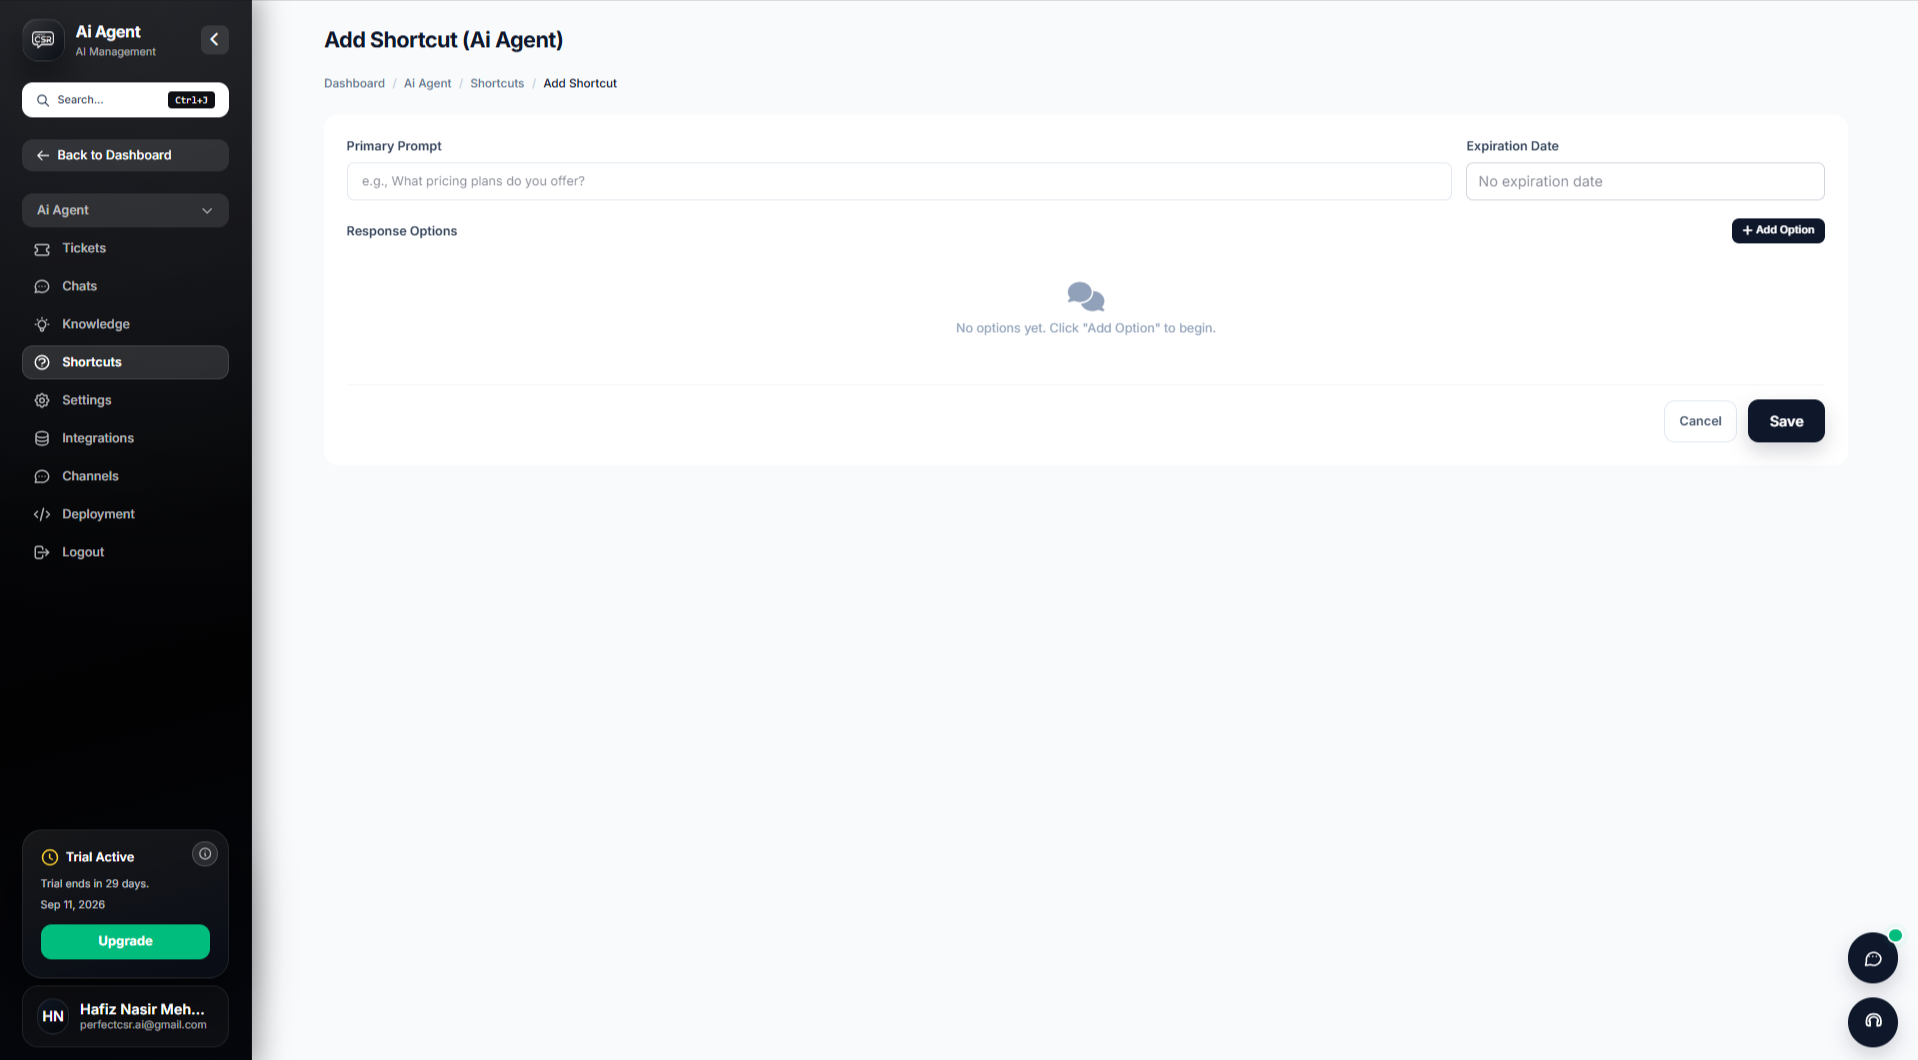
- Open Add shortcuts to the AI Agent.
- Create shortcuts for common customer interactions.
- Enter the Primary Prompt.
- Add the appropriate response options.
- Set an expiration date when the shortcut is temporary.
- Click Save.
Step 4: Configure Your AI Agent Settings
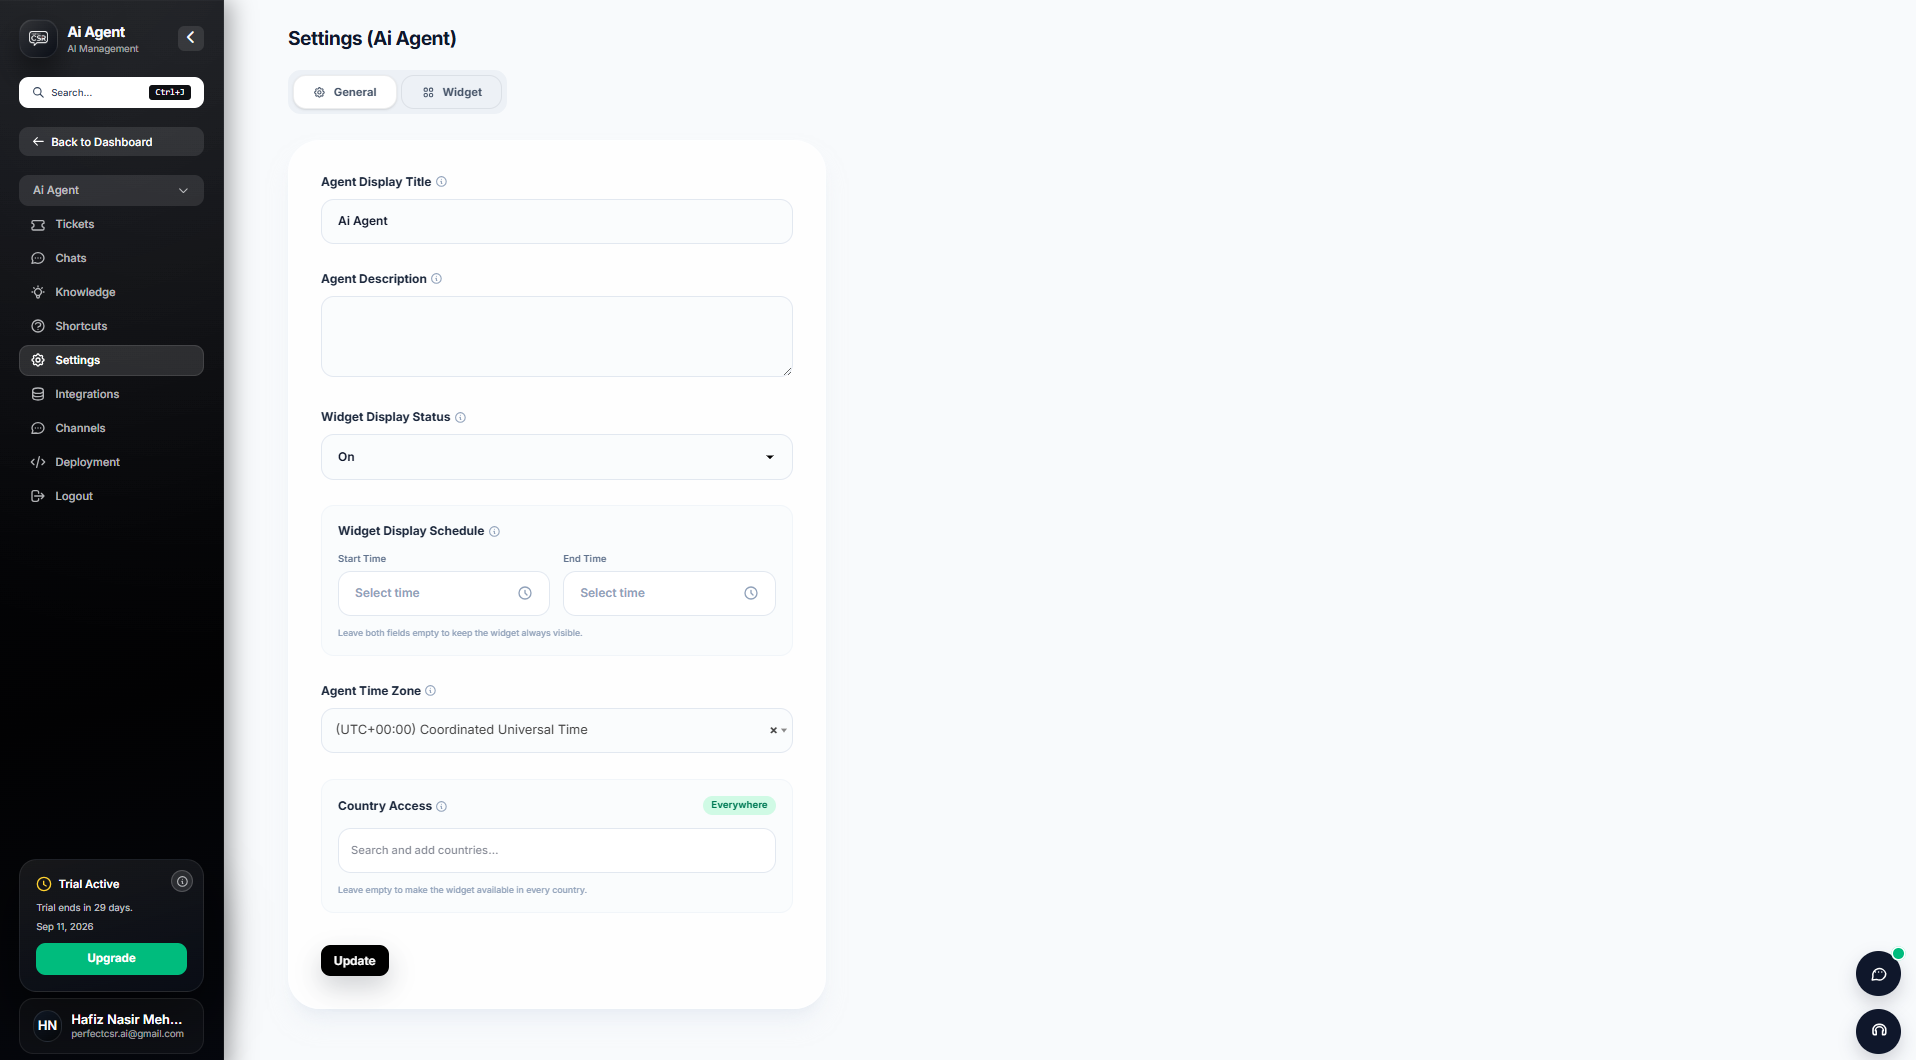
- Open Settings from your agent menu.
- Configure the general agent settings.
- Set or update the Agent Display Title.
- Add an Agent Description.
- Set the Widget Display Status.
- Configure a display schedule when required:
- Start time
- End time
- Select the correct Agent Time Zone.
- Configure Country Access when you want to control where the widget is available.
- Open the Widget settings to configure the website chat experience.
- Save your changes after completing the configuration.
Step 5: Connect Integrations and Conversation Channels
Configure Integrations
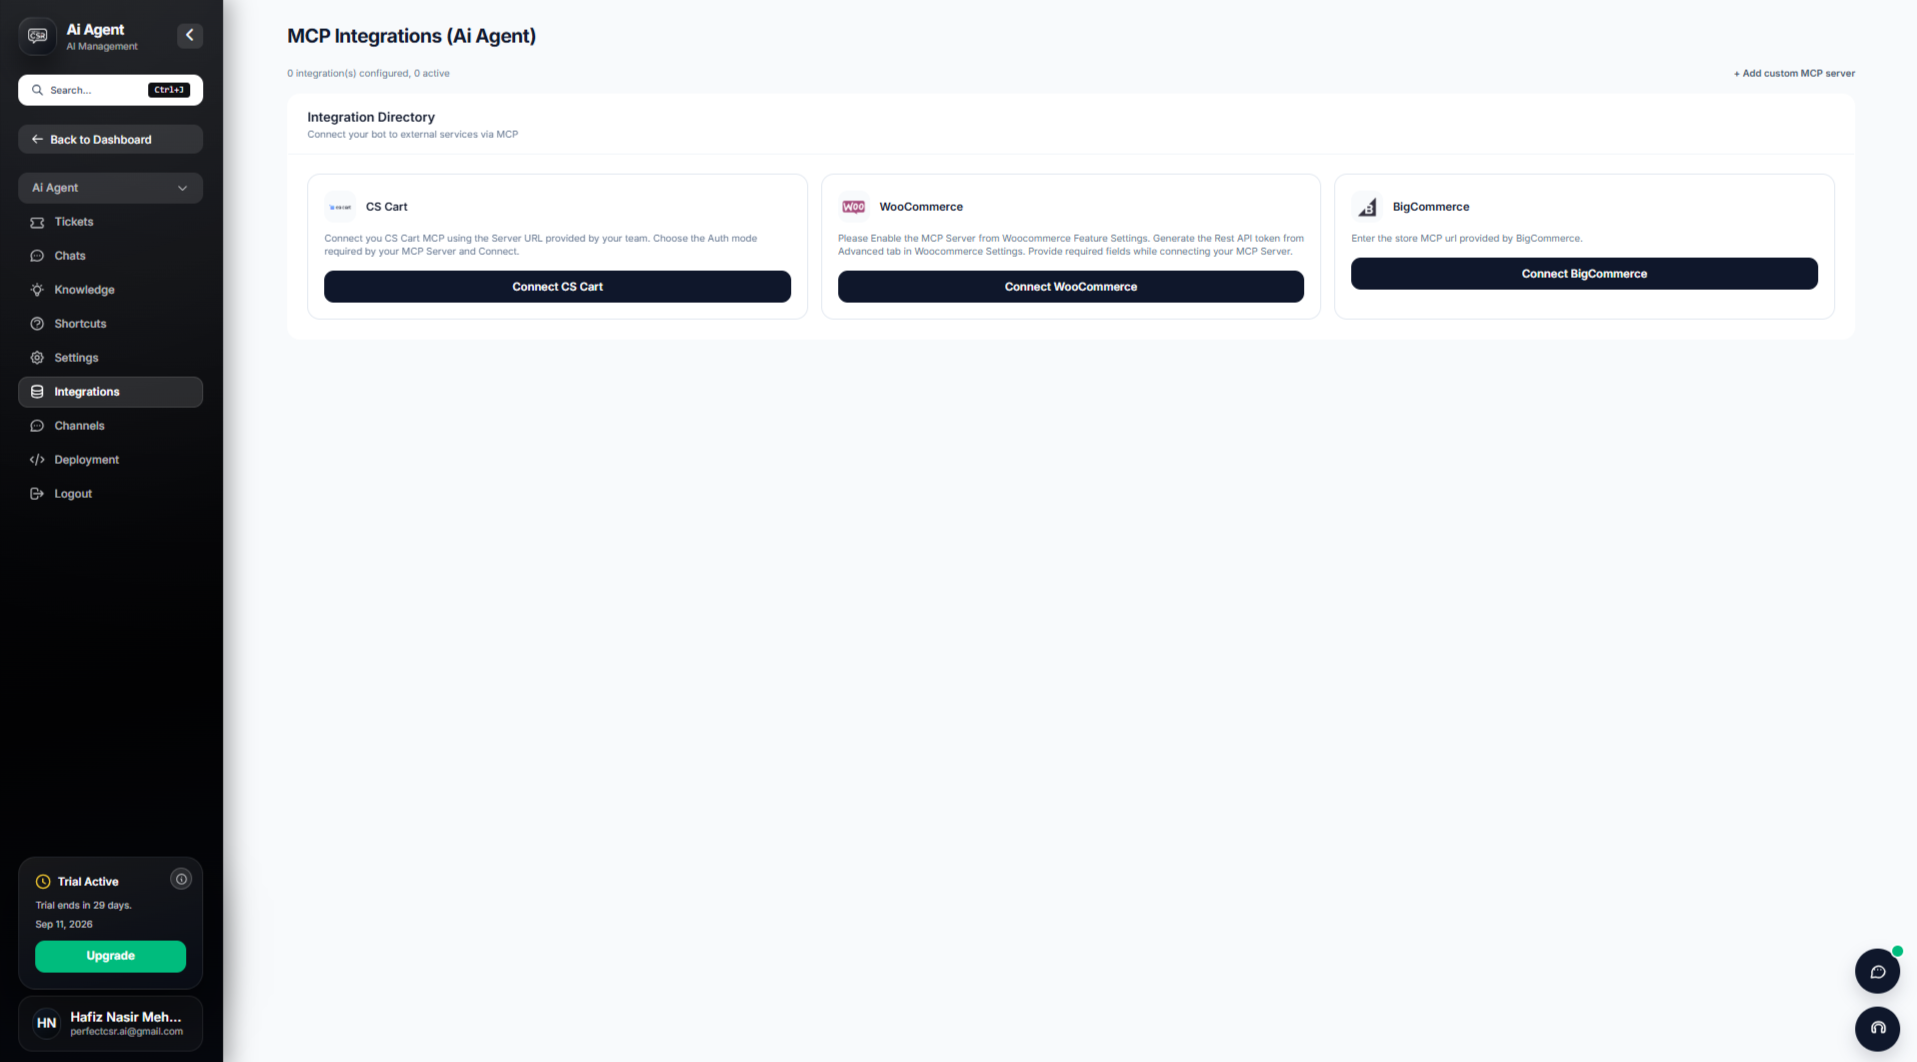
- Open Integrations from your AI agent menu.
- Review the integrations available for your agent.
- Connect the external service required by your business.
- Follow the connection instructions displayed for the selected integration.
- Use the option to add a custom MCP server when applicable.
Configure Conversational Channels
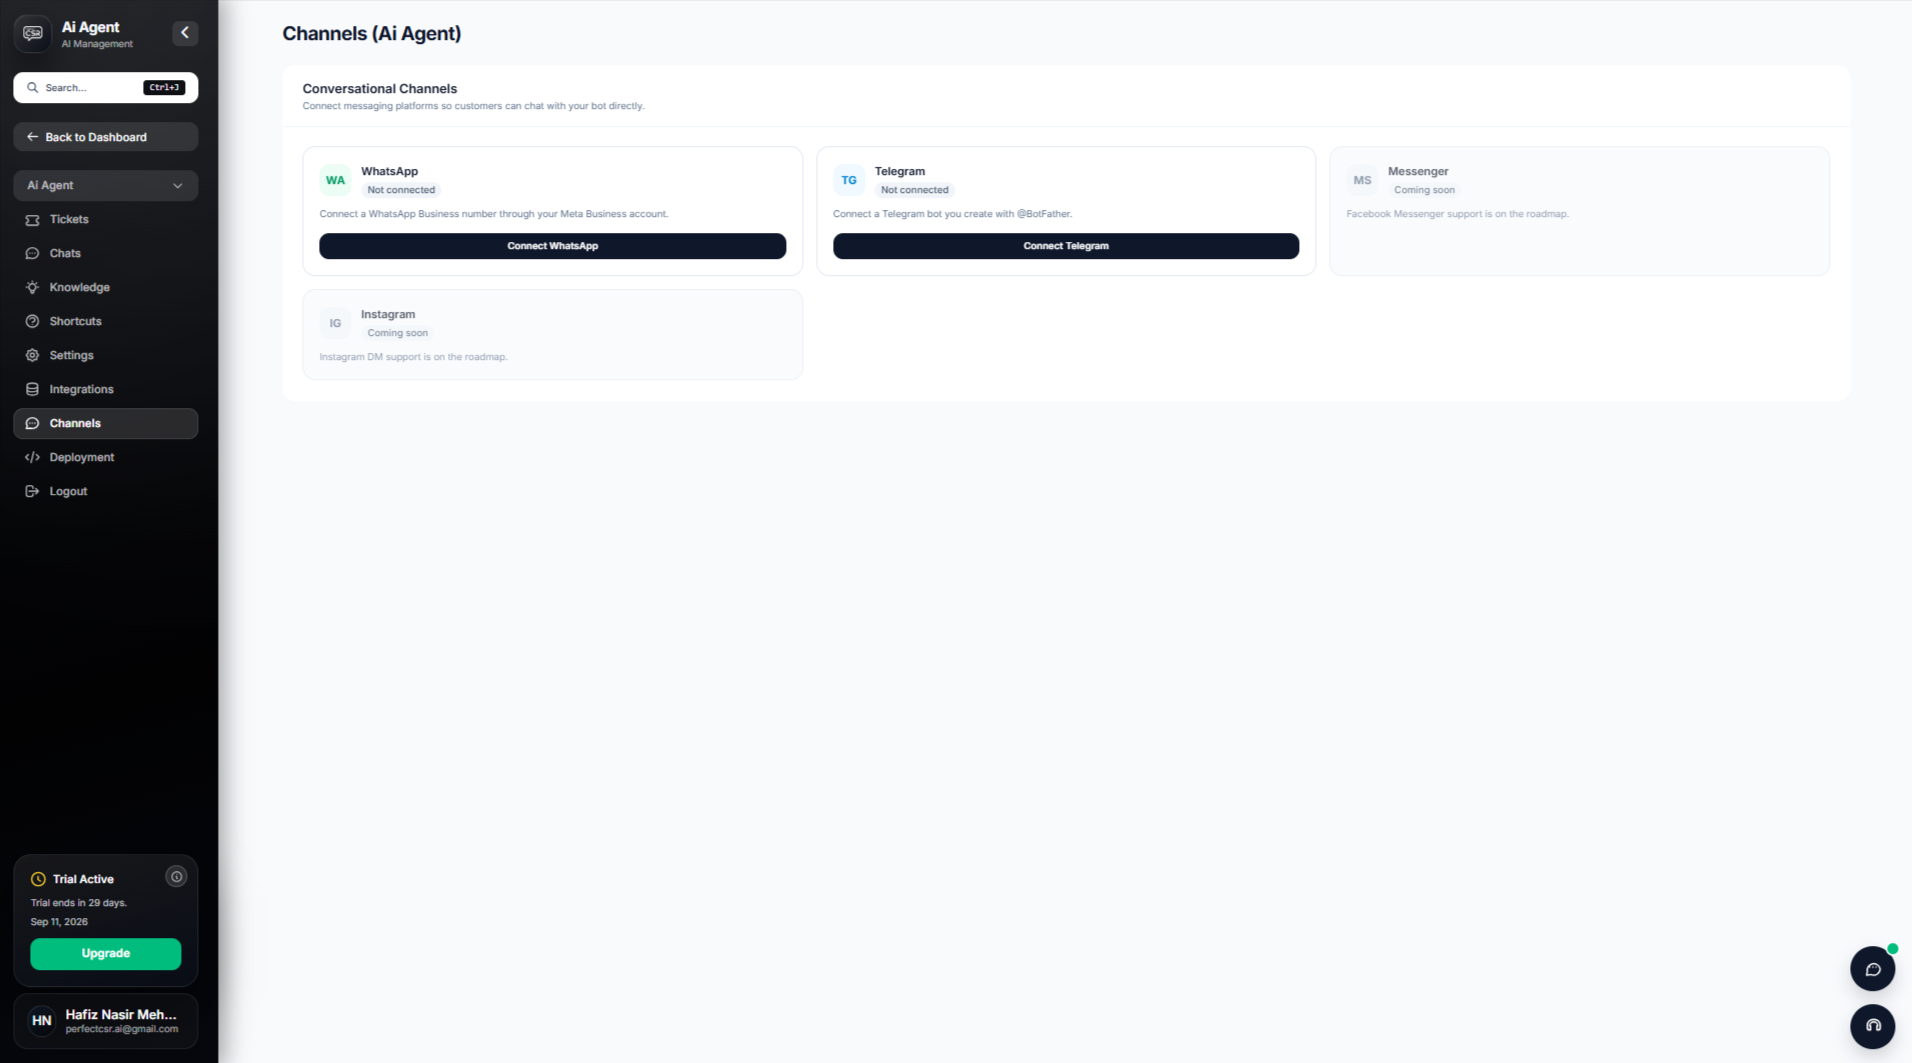
- Open Channels.
- Review the messaging channels currently available in your PerfectCSR account.
- Connect a supported channel when you want customers to communicate with your agent outside the website widget.
- Follow the setup instructions shown for the selected channel.
- Only activate channels your business plans to manage.
Step 6: Deploy PerfectCSR on Your Website
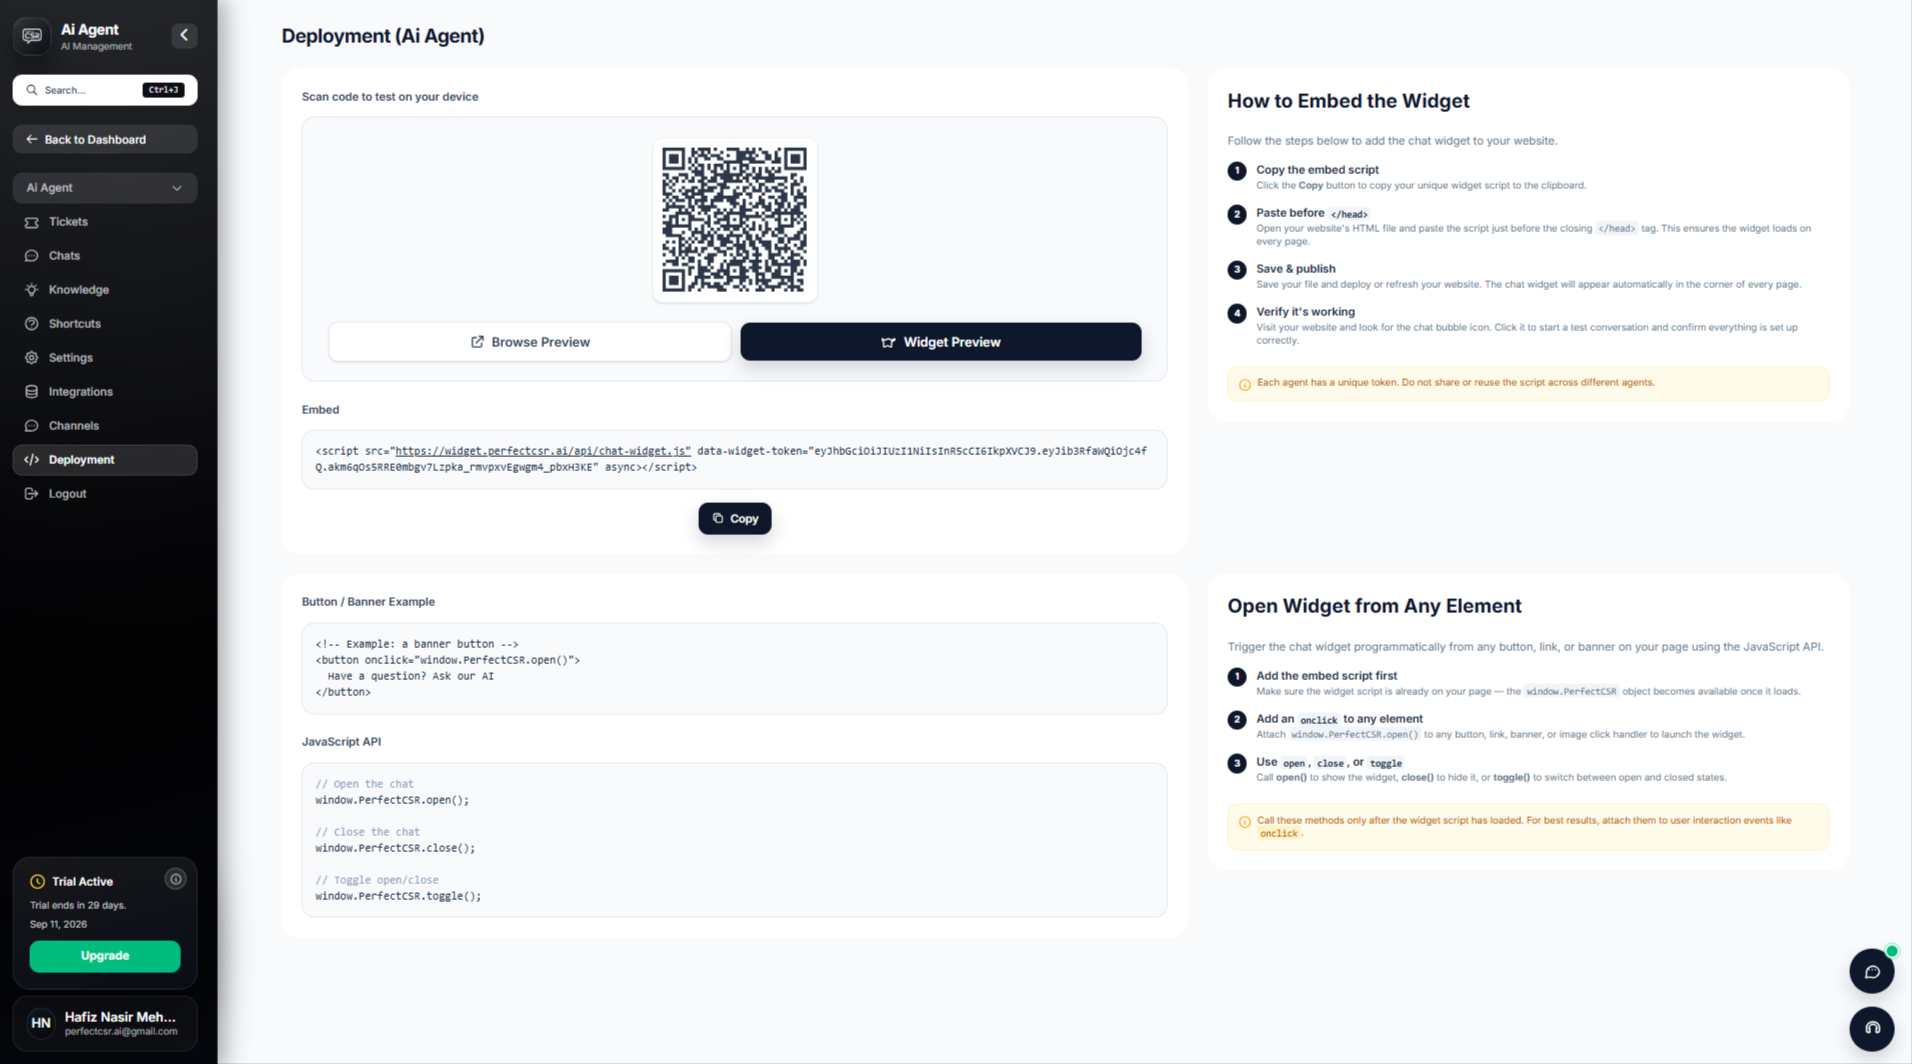
- Open Deployment from your AI agent menu.
- Find the Embed section.
- Click Copy to copy your unique PerfectCSR widget script.
- Open the HTML or code settings for your website.
- Locate the closing </head> tag.
- Paste the PerfectCSR embed script immediately before </head>.
- Save your changes.
- Publish or refresh your website.
- The PerfectCSR chat widget should now appear on your website.
Test Before Going Live
- Use the QR code in the Deployment section to test the agent on your device.
- Use Browser Preview to preview the agent in a browser.
- Use Widget Preview to check the chat widget.
- After adding the script to your website:
- Visit your live website.
- Find the chat bubble.
- Open the chatbot.
- Start a test conversation.
- Ask several common customer questions.
- Confirm that the AI is using the correct business information.
- Check the widget on desktop and mobile.
Step 7: Open the PerfectCSR Widget From Any Website Element
- First, make sure the PerfectCSR embed script is installed on the page.
- Use the PerfectCSR JavaScript API to control the widget from website elements.
- Trigger the chatbot from:
- Buttons
- Links
- Banners
- Images
- Other clickable elements
- Use window.PerfectCSR.open() to open the chat widget.
- Use window.PerfectCSR.close() to close the widget.
- Use window.PerfectCSR.toggle() to switch between open and closed states.
- Attach the required command to the click action of the website element.
- Test the element after publishing your changes.
After Integration: Manage PerfectCSR From Your Dashboard
- Use Dashboard to review overall agent activity.
- Open your individual AI Agent to manage its setup and performance.
- Use Live Chat to view customer conversations.
- Review Tickets and unresolved conversations from your agent workspace.
- Use Knowledge to update the information your agent knows.
- Use Shortcuts to manage predefined interactions.
- Use Settings to control your agent and widget.
- Use Integrations to manage connected services.
- Use Channels to manage available conversation channels.
- Use Deployment whenever you need the embed code or testing tools.
- Use Users to manage team access.
- Review Usage & Billing for account usage.
- Open Plans to manage your plan.
- Use Notifications to manage notification settings.
- Update your account information under Profile.
- Use Tech Support when you need help with PerfectCSR.
PerfectCSR Website Integration Checklist
- Create your PerfectCSR account.
- Verify your email address.
- Complete your profile.
- Create your AI agent.
- Add your website URL.
- Choose the correct agent type.
- Select relevant website pages.
- Test the initial AI agent.
- Add relevant AI agent skills.
- Add custom knowledge.
- Add useful shortcuts.
- Configure agent and widget settings.
- Configure integrations if required.
- Configure additional channels if required.
- Open the Deployment section.
- Copy the PerfectCSR embed script.
- Paste the script before </head>.
- Save and publish your website.
- Test the chatbot on desktop.
- Scan the QR code and test it on mobile.
- Verify customer questions are answered correctly.
- Launch the chatbot for your website visitors.